Kookee keys are simpler than most: there is one kind of API key, for your application, with no read/write tiers to choose between. AI assistants do not use API keys at all; each member connects theirs by signing in or with a personal MCP token.
The API key
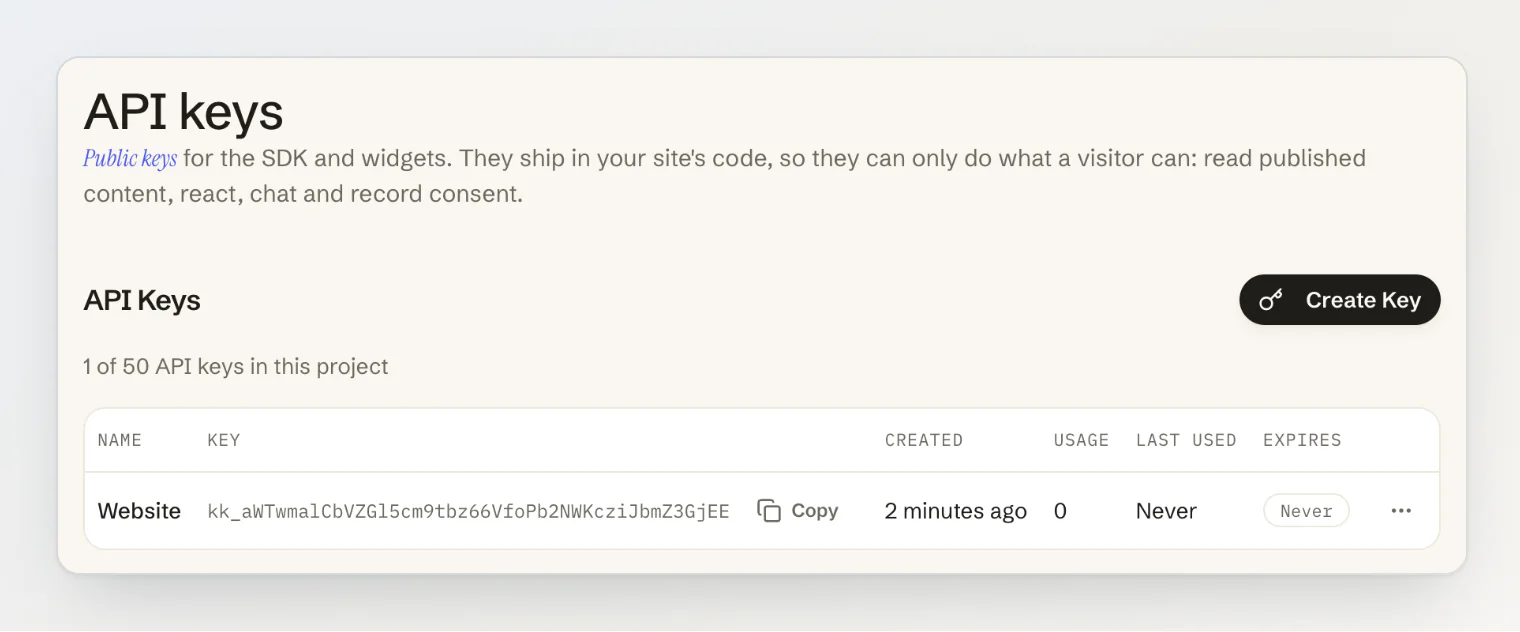
Create one from Connect → API keys → Create Key in your project sidebar. This is the key you use with the SDK, the REST API, the CDN build and the AI chat widget.
It can:
Fetch all published content in every module — blog, changelog, help center, pages, config, announcements and feedback
Read the project's name, default language, hosted portal address and whether its widget settings are saved
Add and remove reactions on any entry by its id — blog posts, changelog entries, help articles and pages
Send questions to the help-center chat
Send a message from the site widget's Feedback tab. It stays private: it waits on the dashboard's Feedback page until your team reviews it
It cannot:
Create, edit, publish, unpublish or delete content
Change project settings, categories or tags
Read drafts
Writing happens in the dashboard, or through an AI assistant with an MCP token (below). The API key is a read key for your public content plus a handful of anonymous, public-safe actions.
It is safe to ship client-side
Because the key only reaches content you have already published and only performs actions that anonymous visitors are meant to perform, putting it in a browser bundle, a mobile app or a <script> tag is fine by design. That is what VITE_- and NEXT_PUBLIC_-prefixed variables are for.
What a leaked key actually costs you: someone else can spend your request quota, rate limit and monthly AI answers, and could spam reactions or widget feedback messages. Feedback messages are capped at 30 an hour per address, 120 an hour per project and 1,000 waiting for review, and none of them is published until your team adds it to the board. That is annoying, not a breach — but it is still worth rotating.
MCP tokens are personal
AI assistants (Claude Code, Cursor and others) connect to Kookee's MCP server with an MCP token, not an API key. Every member creates their own on Connect → MCP server, and the assistant then works as that member: with their role, and with every change recorded under their name and marked via MCP.
Read only — the default. The assistant reads your content, drafts included, and your feedback board, and cannot change anything.
Read and write — the assistant can also create, edit and publish entries, upload files, add and triage feedback posts, and post public comments.
Three rules follow:
The public API rejects MCP tokens, and the MCP server rejects API keys. An MCP token starts with
kkm_, an API key withkk_.Treat an MCP token like a password. It reads your drafts, and a token with write access can publish. Never put it in client code, a repository or a shared document.
Give each assistant its own token, named after the computer or agent that uses it, so you can revoke one without touching the others.
Owners and admins see every member's tokens on the same page and can revoke any of them. Removing or banning a member revokes theirs. For what an assistant can do, see Managing your content from an AI assistant (MCP).
Claude, ChatGPT and VS Code can also connect without a token, by signing in: the member allows the app on a Kookee page and picks its access there. There is nothing to copy, so nothing to leak, and each member sees and disconnects their apps in their account settings, under Security → Connected apps. Changing or resetting the password disconnects all of them. See Connecting Claude, ChatGPT or VS Code to Kookee.
You may also see a key named Portal in your key list. Kookee manages it for your hosted portal; you never need to copy or use it.
Authentication
Every request carries one header:
Kookee-API-Key: your-api-keyThe SDK adds it for you. With curl or fetch, add it yourself:
curl -H "Kookee-API-Key: YOUR_API_KEY" https://api.kookee.dev/v1/blog/postsThe SDK also accepts a projectId in place of the key (new Kookee({ projectId }), sent as a Kookee-Project-Id header), but that works only while the project's hosted portal is enabled — otherwise the API answers 403 PORTAL_NOT_ENABLED — so on your own site use the API key, restricted with allowed origins (below).
Storing keys
Use environment variables, never literals in source:
# Node.js / Next.js — .env or .env.local
KOOKEE_API_KEY=your-api-key

# Vite / Vue — .env
VITE_KOOKEE_API_KEY=your-api-key
Add .env and .env.local to .gitignore. Keeping keys out of the repository is about hygiene and easy rotation, not because the API key is secret.
Restricting where a key works
Under Settings → Project, the Allowed Origins card lists the domains a key works from in a browser. When it is set, browser requests from any other domain are refused with 403 ORIGIN_NOT_ALLOWED. This is the right tool if you want to stop a copied key from being used on someone else's site. Server-to-server requests carry no origin and are unaffected, so allowed origins do not stop anyone who copied the key from calling the API from a server; If a key leaks below covers replacing it.
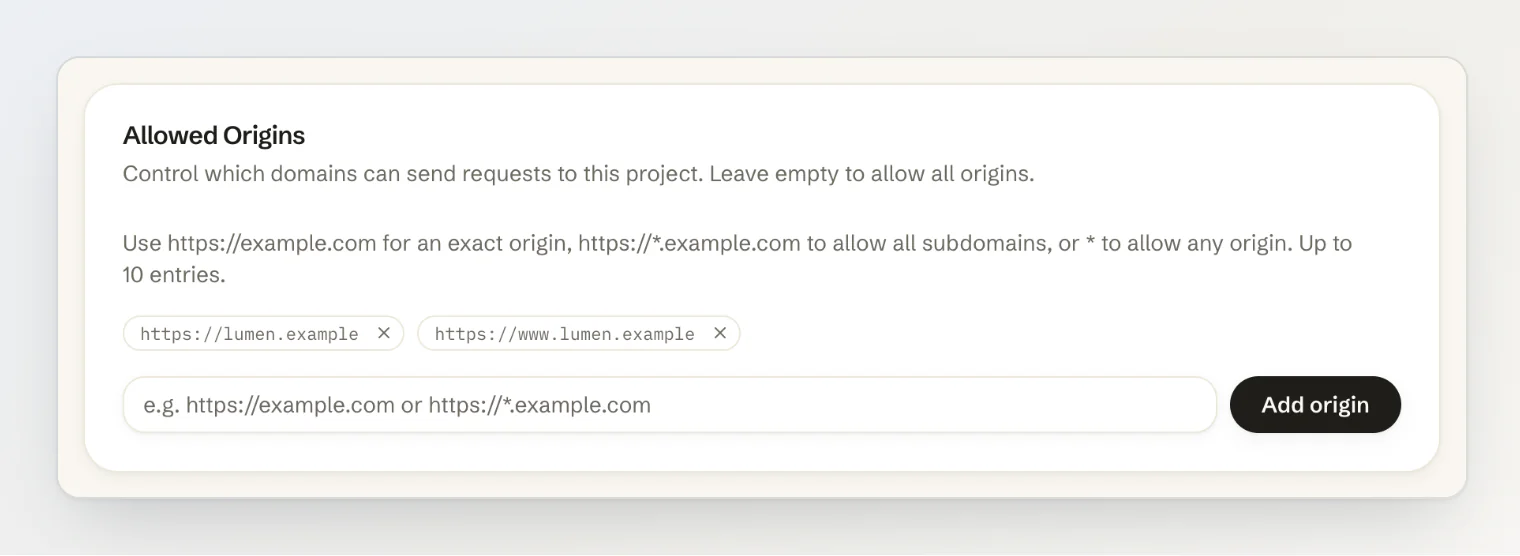
This list also governs the AI chat widget. Once the list is set, every website where you install the widget must have its domain on it, or its chat requests are rejected — add the domain before you paste the snippet in.
If a key leaks
Revoke it on Connect → API keys and create a replacement. Revocation is immediate, so deploy the new key first to avoid downtime.
API key — low severity. Rotate it so your usage stays attributed correctly, and consider setting allowed origins.
MCP token — revoke it at once on Connect → MCP server. It reads your drafts, and a token with write access can publish as its member.
Connected app — disconnect it under Security → Connected apps in your account settings, or change your password to disconnect every app at once.