A project starts with one person: whoever created it. Everyone else gets in one of two ways — you invite them by email address, or you share an invite link they use themselves.
Both live on the project's Team page, and both are limited to owners and admins.
Roles
Every member of a project holds one of three roles.
Member | Admin | Owner | |
|---|---|---|---|
Read and write content | ✓ | ✓ | ✓ |
Change project settings | ✓ | ✓ | |
Create and revoke API keys | ✓ | ✓ | |
Manage webhooks and integrations | ✓ | ✓ | |
Turn off someone else's new feedback notifications | ✓ | ✓ | |
Invite and remove people | ✓ | ✓ | |
Create and revoke invite links | ✓ | ✓ | |
Change someone's role | ✓ | ||
Transfer or delete the project | ✓ |
There is exactly one owner: the person who created the project, until they transfer it to somebody else. Everyone else is an admin or a member, and an owner can change that at any time from the row menu on the Team page.
Everyone in the project hears about new feedback and about the posts they are part of. Feedback notifications for your team explains who is told what, and how each person turns new feedback notifications off.
Invite by email
Use this when you know exactly who should join.
Open Team and choose Add Member.
Enter one or more email addresses, separated by commas, spaces or new lines.
Choose Admin or Member for all of them.
Send.
What happens next depends on the address. If it already belongs to a Kookee account with a verified email, that person is added to the project immediately. Otherwise they receive an invitation email and join when they accept it — and if they have to create an account first, the invitation is accepted for them as soon as they verify their address.
Invitations expire after 7 days. Until then they appear under Pending Invitations, where you can copy the invitation link, send it again, or revoke it.
Invite with a link
Use this when you do not want to type addresses — onboarding a new intake, or posting one link in an internal channel.
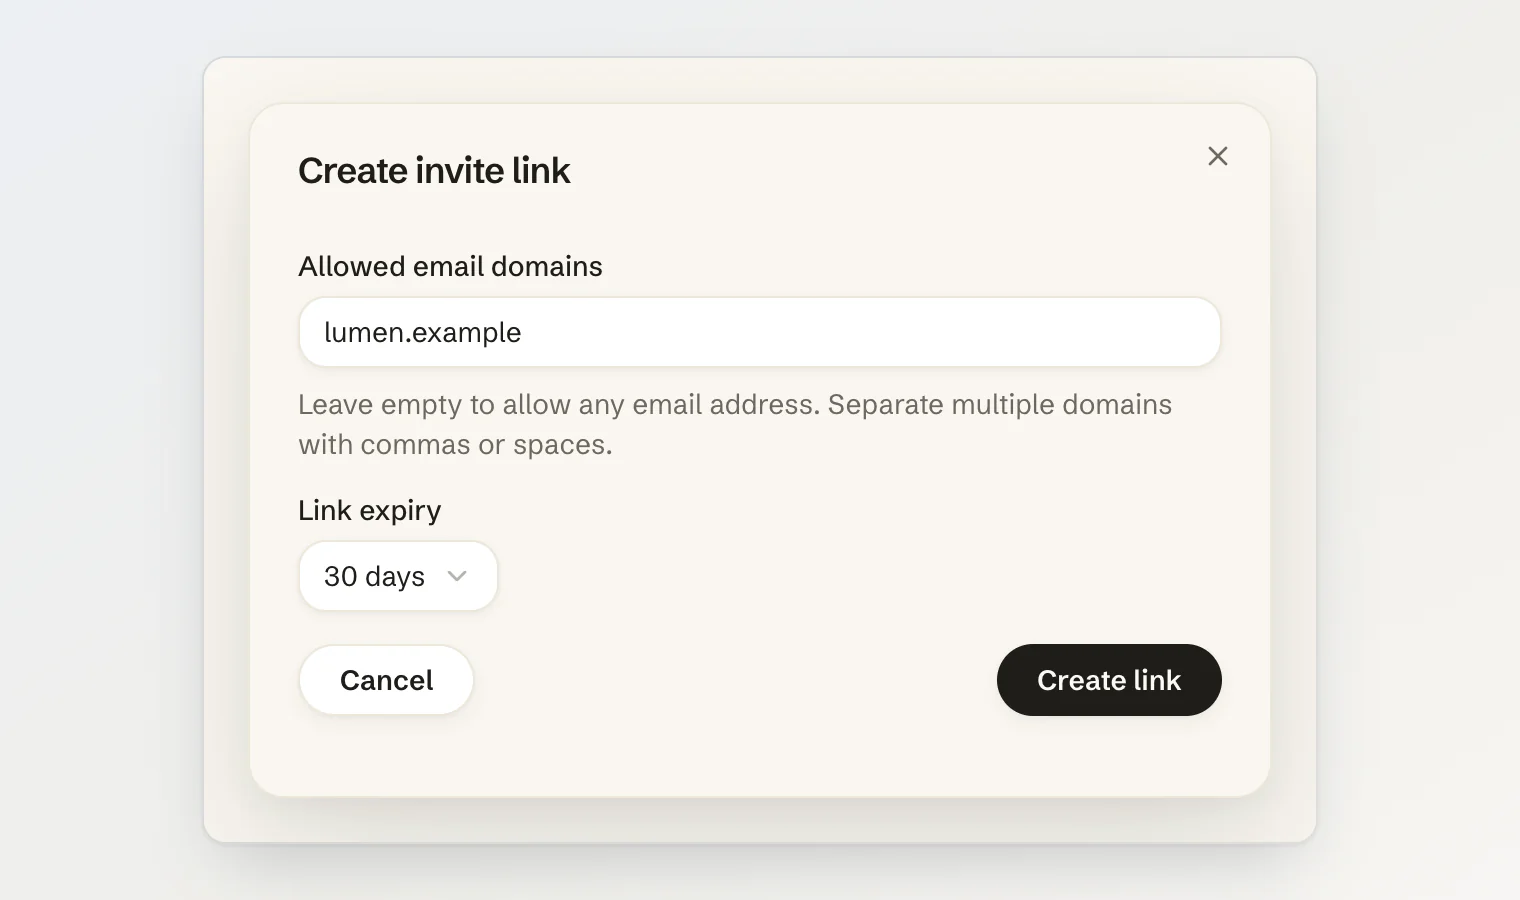
Choose Create link under Invite links and make two decisions.
Allowed email domains. Leave this empty and anyone with the link can join. Fill it in, with up to five domains, and only people whose verified email address is on one of those domains may use it. An unverified address is refused even when the domain matches, so the restriction cannot be talked around by typing the right address at sign-up.
Enter domains as plain ASCII, like example.com. An internationalised domain has to be entered in its punycode form (xn--…).
Link expiry. 7 days, 30 days, or never. 30 days is the default; prefer a date over never for anything you paste somewhere it will be archived.
The link is shown in full once, when it is created, and afterwards in the list on the Team page. Every live link shows what it allows and when it runs out, with a copy button and a revoke button.
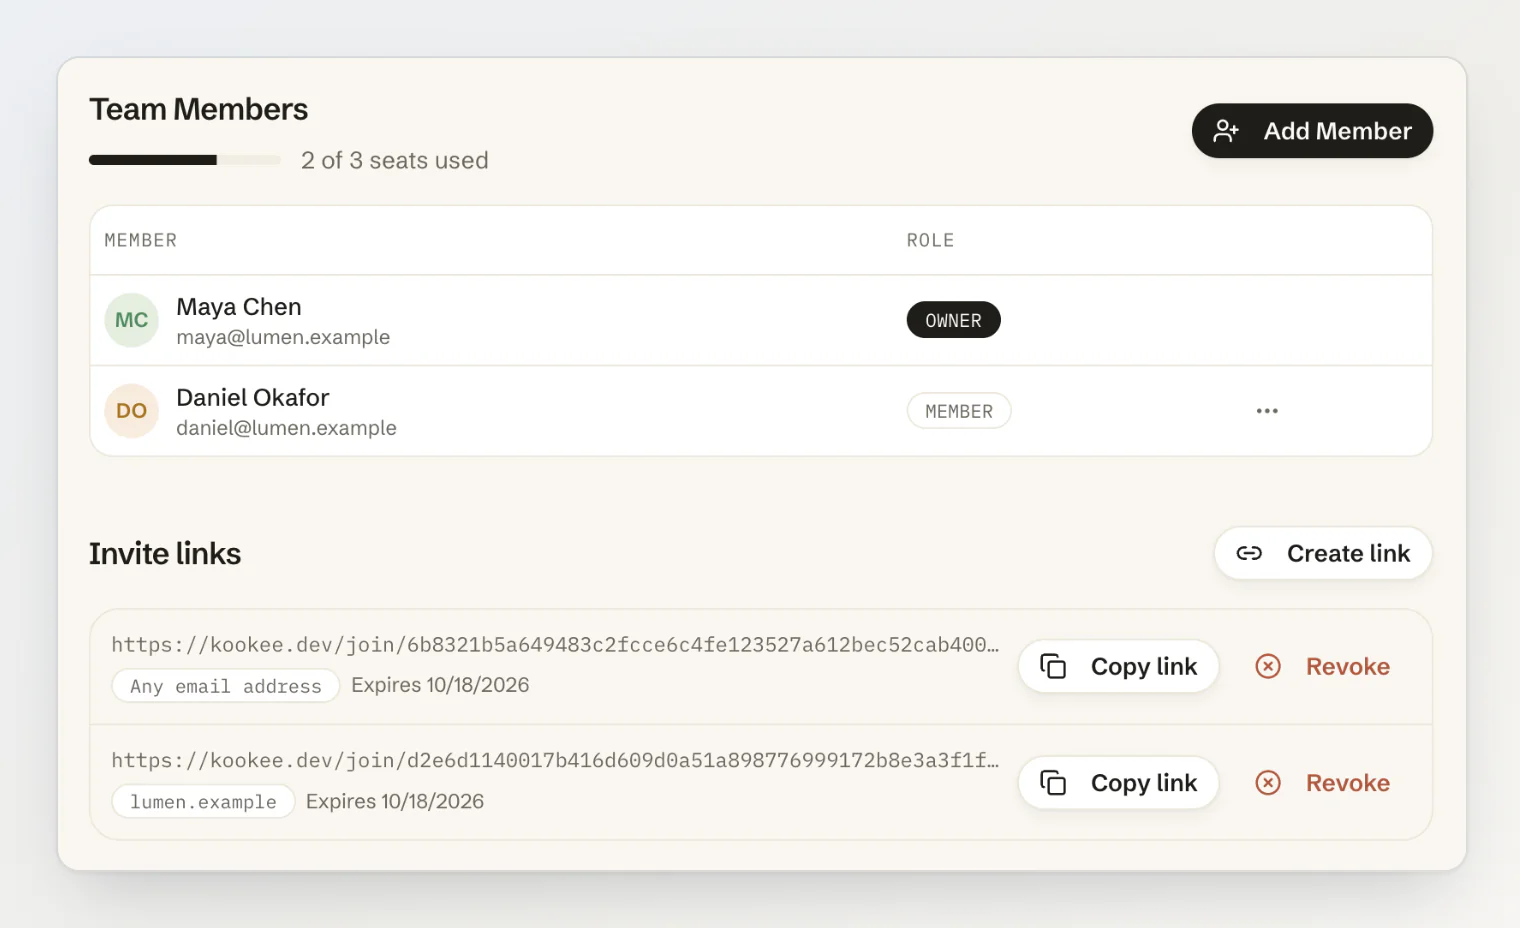
A project can hold up to 20 live links at a time.
What the person clicking it sees
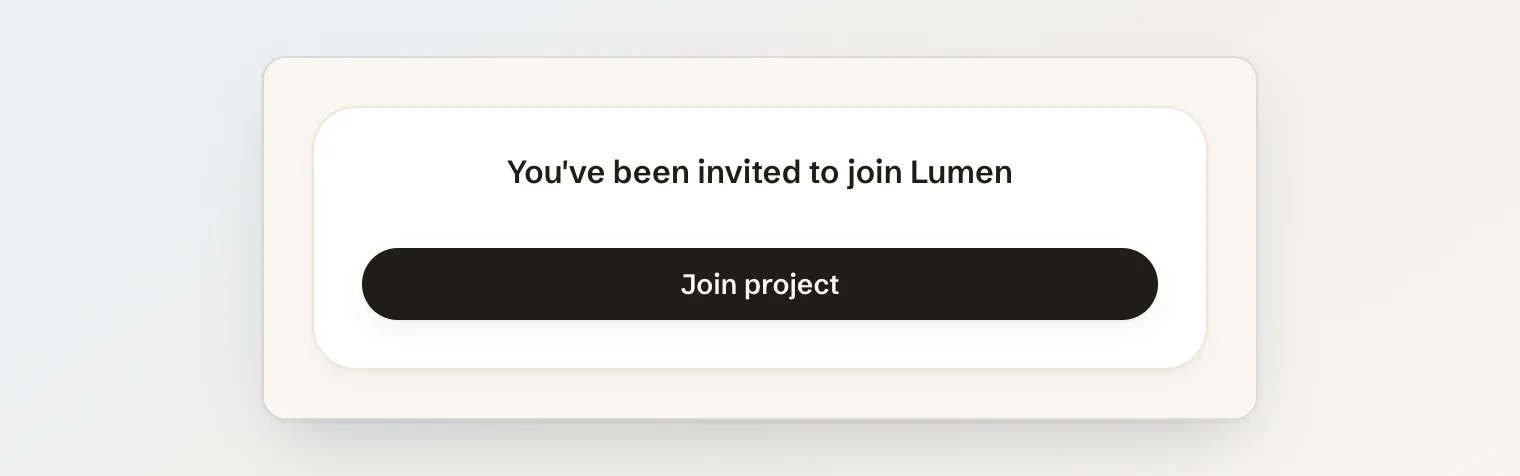
They have to be signed in with a real account — browsing as a guest is not enough — and the page names the project they are joining, and the domains the link is restricted to if it is.
Everyone who joins through a link arrives as a member. A link can never grant admin rights; promote the person afterwards if they need more. Someone who is already in the project simply lands on the project instead.
Revoking a link
Choose Revoke next to it. People who already joined stay in the project — revoking closes the door, it does not undo the people who came through it.
Links are also revoked for you in three cases, because a link carries the authority of whoever made it:
the person who created it is removed from the project
they are demoted from owner or admin to member
they are banned from the project
Seats
Your plan sets how many people a project can hold, and pending invitations hold a seat until they are accepted, declined, revoked or expire. The Team page shows the count.
Plan | People per project |
|---|---|
Free | 3 |
Pro | 10 |
Ultra | 100 |
When every seat is taken, Add Member is disabled, and anyone opening an invite link is told the project is full rather than being let in. Free a seat by removing a member or revoking a pending invitation, or move to a larger plan — the limit follows the plan of the person who owns the project, not the plan of whoever is inviting.
See Rate limits, plans and error handling for every other limit a plan sets.
Removing someone
Open the row menu next to a member and choose Remove member. Owners and admins can do this; nobody can remove the owner.
Removing a person also deletes their personal MCP tokens for that project and revokes any invite links they created, so their assistant loses access at the same moment they do.