The site widget puts an AI assistant on your website and, with more tabs, your news, your help center and a form for sending you feedback. The assistant answers visitors' questions from your published help center articles, and from the page it is running on. Installing it takes one script tag — no React, no bundler, no build step.
The snippet
<script async src="https://kookee.dev/chat/latest.js" data-api-key="YOUR_API_KEY"></script>Paste it anywhere in your HTML — in the <head> or before the closing </body> tag both work; the widget waits for the page to be ready before it mounts. A ready-made copy with your project's key already filled in is on the Installation tab of the project's Site widget page in the dashboard.
Build the snippet in the dashboard
The Installation tab is a small builder. Step 1 has the look — theme, position, language, accent color, launcher text, and whether to hide the launcher — and two switches for how the widget behaves on your page. A live preview beside the controls shows each change.
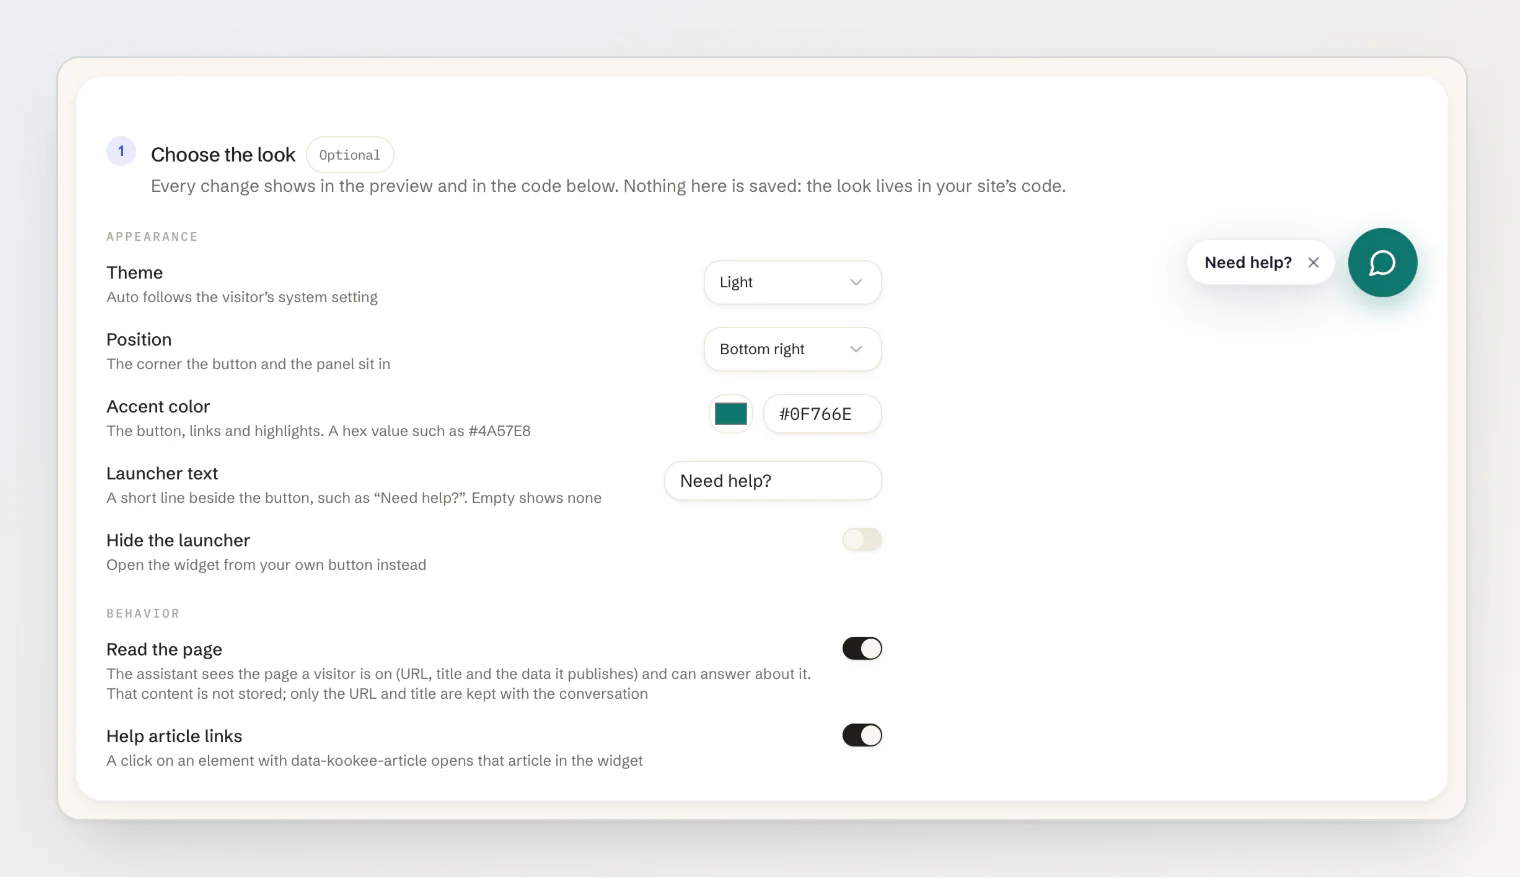
Step 2 turns those choices into code, as a script tag or as a React component. Only what differs from the defaults is written out, so the snippet stays short.
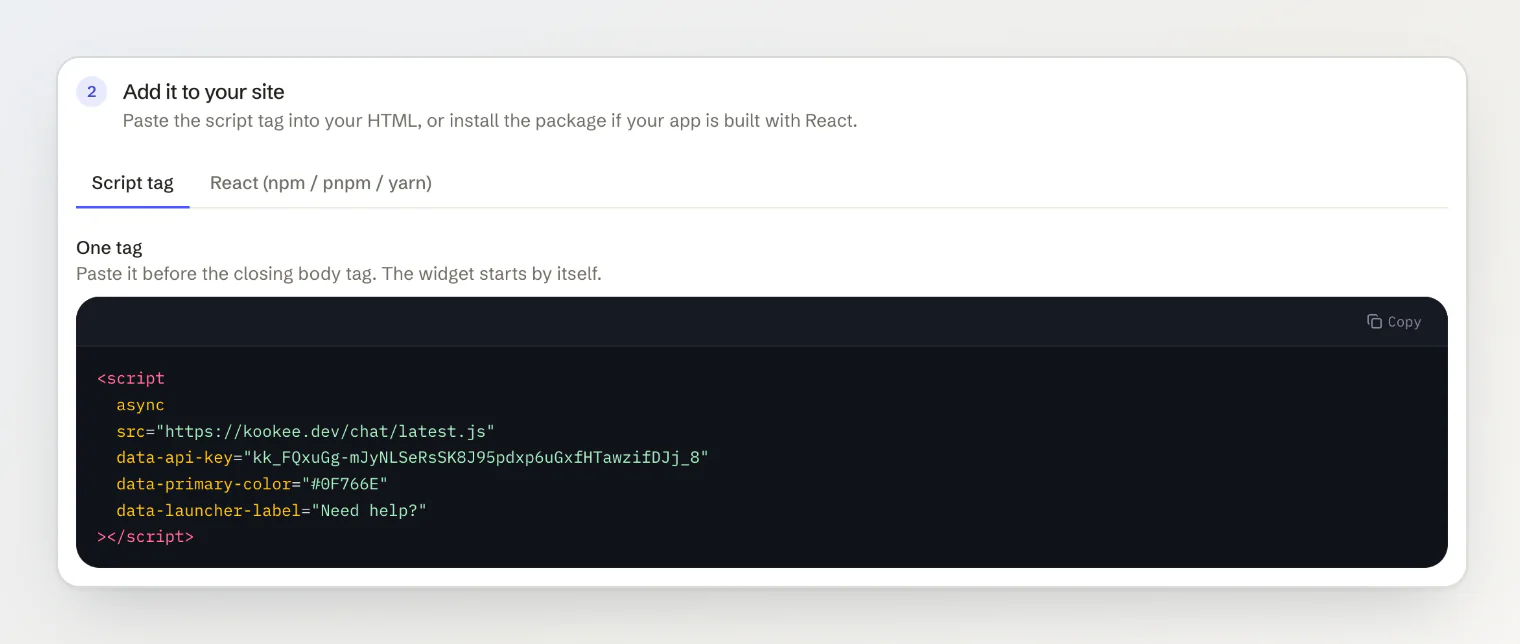
Nothing on this tab is saved. The look lives in the code you paste into your site, so it is there from the first paint and can differ from one site to the next. What the widget says — its tabs, texts and links — and the header image of Home are saved in the dashboard instead, on the Customize tab. See Add Home and Help tabs to your widget.
Allow your domain
The widget runs in the visitor's browser, so it is subject to your project's origin check. If Allowed Origins in project settings lists any domains, add the website's domain too, or its chat requests are rejected. An empty list allows every origin.
Do this before you paste the snippet in. A widget installed on a domain missing from a non-empty list will load and then fail on the first question. Remember to add every domain you want it on — a staging site and a production site are two entries.
It reads the page it is on
With no configuration at all, the widget sends a short summary of the current page with each question:
the URL — origin and path only, never the query string
the page title and meta description
any
schema.orgJSON-LD the page already publishes for search enginesup to 1500 characters of the main text, with navigation, sidebars and footers stripped out
That last two are what make this useful for free. Shopify, WooCommerce and most WordPress SEO plugins already print product data — name, price, availability — into every product page as JSON-LD, because Google reads it. The widget reads the same block, so "is this one in stock?" and "what does it cost?" work on day one, with nothing to configure and no catalog to import.
On an article it means "summarize this", on a pricing page "what's included in Pro?".
On a Shopify or WooCommerce store the widget goes further: it detects the platform and searches the store's own public product API when a visitor asks about the catalog generally ("anything under €500?"). Prices and stock are live, because they come from your store rather than a copy. Turn it off with data-catalog="false".
What is stored
Page content is used to answer the question in front of it and is not stored. Only the page URL and title are kept with the conversation, so you can see where a visitor was when you read the transcript later.
Conversations themselves are kept for 90 days and are visible to your team in the dashboard. Mention that in your privacy policy.
If a page shows personal data — an account page, an order history, anything behind a login — turn page reading off for it:
<script async src="https://kookee.dev/chat/latest.js"
  data-api-key="YOUR_API_KEY"
  data-page-context="false"></script>
Configure it with data attributes
Everything the widget needs can be set on the tag itself:
<script
  async
  src="https://kookee.dev/chat/latest.js"
  data-api-key="YOUR_API_KEY"
  data-title="Help"
  data-greeting="Hi! How can I help?"
  data-placeholder="Ask a question..."
  data-launcher-label="Need help?"
  data-position="bottom-right"
  data-theme="auto"
  data-primary-color="#6366f1"
></script>
The full set:
data-api-key— your project API key. Required.data-base-url— override the API base URL.data-locale— the widget's language.auto, the default, follows the page; a tag such asfrfixes it. See Show the widget in your visitors' language.data-title— the panel header.data-greeting— message shown before the first question.data-placeholder— input placeholder text.data-tabs— the tabs to show, in order, such ashome,ask,help,feedback. The widget shows exactly these: leaveaskout for a widget with no chat.data-launcher-label— text for the label pill next to the launcher button.data-position—bottom-rightorbottom-left.data-theme—light,darkorauto. Change it later withKookeeChat.setTheme().data-primary-color— accent color.data-hide-launcher— set totrueto hide the launcher and open the widget from your own button.data-page-context— set tofalseto stop the widget reading the page. Messages sent from the Feedback tab then carry no page address either.data-anchors— set tofalseto stop elements withdata-kookee-articlefrom opening articles in the widget.data-catalog— set tofalseto stop Shopify/WooCommerce product search.
See Customize the chat widget's appearance for what each of these looks like.
The title, greeting, placeholder and tabs can also be saved in the dashboard, where they change without touching your site. An attribute on the tag wins over the saved value.
When the tag cannot configure itself
The widget reads those data-* attributes off its own script tag. That only works for a classic external script — the plain form above. Two cases break it:
type="module"scriptsTag managers that inline the script source rather than loading the file
In both, call init() yourself instead:
<script src="https://kookee.dev/chat/latest.js"></script>
<script>
  window.KookeeChat.init({ apiKey: 'YOUR_API_KEY', title: 'Help' });
</script>
init() takes the same settings under their plain names, plus several the attributes do not cover. To keep async on the tag while calling init() from your own code, add the small stub that queues calls until the script loads — both are covered in Control the chat widget from JavaScript.
What the widget answers from
Three things, in order of preference:
Your published help center articles. Drafts are invisible to it. Every answer cites the articles it drew on, and a visitor can open one right inside the widget.
The page the visitor is on, as described above.
Tools you register yourself, if you are a developer and want the assistant to reach your own data or act on your site — see Let the assistant use your own data with tools.
If the chat gives a poor answer to a product question, the fix is usually an article: write or expand the one that should have covered it, publish it, and the chat picks it up. The Conversations tab on the Site widget page shows you exactly which questions went unanswered — see Read what visitors asked your assistant.
Stopping an answer
While an answer is streaming, the send button becomes a stop button. Pressing it keeps the text that already arrived and stops the server generating the rest — which is what a visitor wants the moment they can see the answer is about the wrong thing.
Stopping is not a failure: no error notice appears, the partial answer stays in the conversation and in the transcript you read later, and the visitor can ask the next question immediately.
Tell it how to behave
The Assistant Instructions field on the Customize tab of the Site widget page is a free-text box for tone, currency, shipping rules, and when to hand off to a human. It applies everywhere the widget runs, and takes no code. See Give your assistant instructions.
In a React app
If your site is already React, use the component instead — it is the same widget. The React tab of step 2 writes it for you, with the install command and the same settings as props:
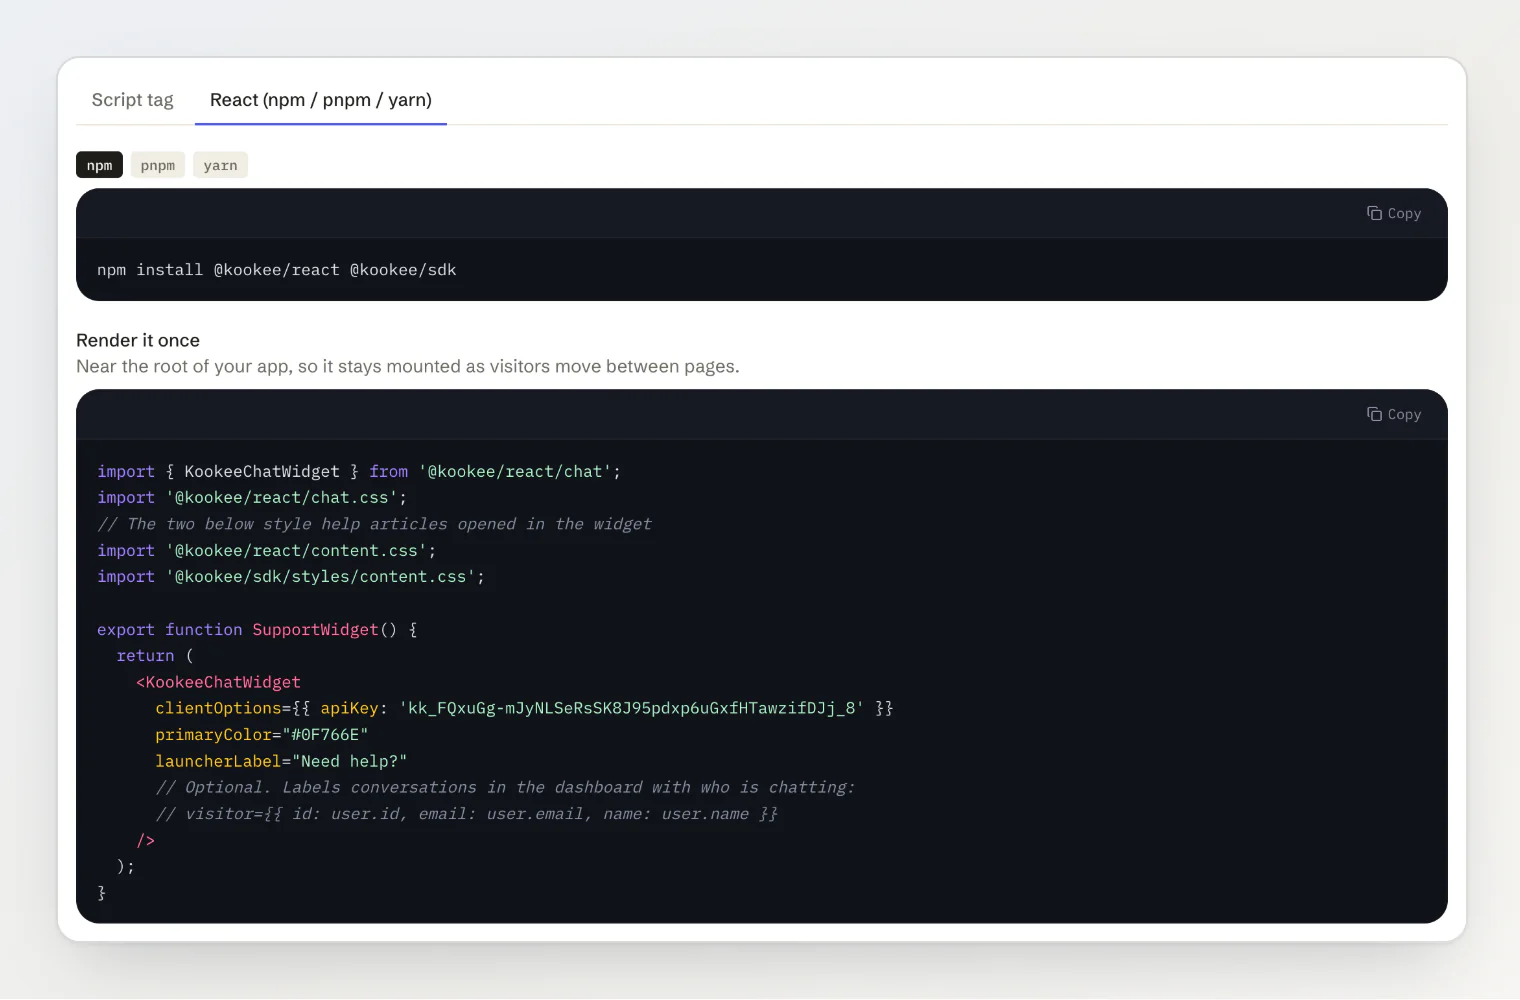
import { KookeeChatWidget } from '@kookee/react/chat';
import '@kookee/react/chat.css';
// The two below style help articles opened in the widget
import '@kookee/react/content.css';
import '@kookee/sdk/styles/content.css';
See Building a help center with search and AI chat.
On the hosted portal
If you use the Kookee public portal, you do not need to install anything. Switch on Show the site widget on the Public Portal page and it is there — see Using the public portal.